The most common question Truely gets from first-time users is some variation of: "If I add the eSIM, will I lose my existing number?" The answer is no — and the explanation of why is useful to understand before you travel.
Dual SIM means your phone maintains two separate cellular connections simultaneously. One is your home carrier SIM (physical or eSIM) that carries your existing phone number and handles voice calls and SMS. The other is Truely's eSIM, which handles data. The two connections run in parallel. Your contacts can still reach you at your regular number. Apps that verify phone numbers via SMS — banking apps, WhatsApp two-factor authentication — still work normally.
How Dual SIM Works on iPhone
iPhones since the XS (2018) support dual SIM through a combination of one physical nano-SIM and one eSIM. Starting with iPhone 13, some models support dual eSIM (two simultaneous eSIM profiles with no physical SIM required). iPhone 14 and later US models have no physical SIM slot at all and support up to eight stored eSIM profiles with two active simultaneously.
To configure a Truely eSIM alongside your existing iPhone SIM:
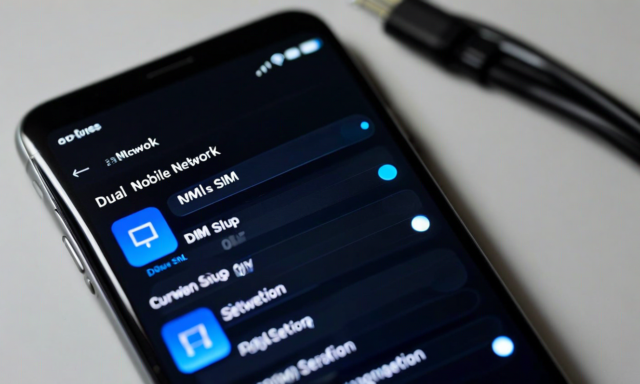
Step 1: Go to Settings > Mobile Data (or Cellular, depending on your iOS region). You'll see your existing SIM listed under "SIMs." Your regular line should show your carrier name and number.
Step 2: Tap "Add eSIM" at the bottom of the SIMs section. iOS will prompt you to either scan a QR code or enter a code manually. Open the Truely QR code from your purchase confirmation email and scan it. The profile installs and appears as a second line — typically labeled "Truely" or with the destination carrier's name.
Step 3: After installation, iOS will ask which line to use for cellular data. Select the Truely eSIM as your data line. Your home SIM remains set as the default for voice calls and SMS — this is the default configuration and doesn't need to be changed.
Step 4: Confirm that "Allow Mobile Data Switching" is turned off. This setting, found under Settings > Mobile Data > Mobile Data, tells iOS not to automatically switch data between lines based on signal quality. You want Truely as the dedicated data line while abroad — disabling auto-switching keeps data costs predictable.
That's the full setup. Voice calls from your contacts will ring through your home number. Data traffic — apps, maps, browsing, email — will route through Truely.
How Dual SIM Works on Android (Samsung)
Samsung Galaxy S21 and later models support eSIM alongside a physical nano-SIM. The Galaxy S22 Ultra and S23 series also support dual eSIM on some hardware variants, though availability depends on the region the device was purchased in.
On Samsung, the setup path is:
Settings > Connections > SIM card manager. You'll see your existing physical SIM listed. Tap "Add eSIM" or the plus icon. The camera opens for QR scanning. Scan the Truely QR code. After installation, both lines appear in SIM card manager.
Set the preferred SIM for mobile data by tapping "Mobile data" in SIM card manager and selecting Truely. Set your home SIM as the preferred line for calls. Samsung's dual SIM settings also allow you to specify a preferred SIM for each individual contact — a useful feature for travelers who have regular contacts in their destination country and want those calls to route through a specific line.
One Samsung-specific note: some older Samsung devices (S10, S20 on certain regional variants) support eSIM but have a firmware limitation that requires disabling the physical SIM before the eSIM activates for data. This is documented in Samsung's own support materials and affects a small percentage of users on older hardware. If you have an S20 or earlier and experience data issues after adding a Truely eSIM, check whether this firmware limitation applies to your specific hardware variant.
How Dual SIM Works on Google Pixel
Pixel 3 and later models support eSIM. The setup path is:
Settings > Network & internet > SIM cards > + Add SIM. Select "Download a SIM instead." Scan the Truely QR code. After installation, both SIMs appear in the SIM cards settings. Set Truely as the preferred data SIM. Google's implementation is straightforward and has no known firmware quirks specific to dual SIM data routing.
What "Active" vs "Stored" eSIM Profiles Mean
On iPhone 13 and later, and some newer Android devices, you can store multiple eSIM profiles but only activate two simultaneously. This is useful for frequent travelers who visit the same destinations repeatedly.
A stored but inactive eSIM profile occupies a slot on the device's eUICC chip but does not consume any plan credits. Your Truely APAC plan, your Truely European plan, and your home carrier can all be stored on the device. When you're traveling in Asia, you activate the APAC plan. When you return home, you switch the APAC plan to inactive (stored) and your home carrier handles all traffic normally. When your next Europe trip comes up, you activate the European plan.
Switching between stored and active plans is a few taps in settings — no new QR scan required for a plan you've already installed. This is one of the genuine quality-of-life improvements eSIM provides over physical SIM management: the "SIM drawer" is in your phone settings, not in a drawer in your desk.
Managing Roaming Charges on Your Home SIM
The main reason to configure dual SIM correctly is to avoid unexpected charges on your home carrier while using Truely for data. If your home SIM has data roaming enabled and is set as the active data line, your home carrier will charge you for any data traffic that routes through it — even if Truely is also active on the device.
The configuration steps above — setting Truely as the designated data SIM and disabling auto-switching — prevent this. Your home carrier sees your device connected to their network for voice registration (so incoming calls work) but no data traffic routes through them.
For extra caution: after setting up dual SIM but before boarding your flight, navigate to your home carrier's SIM settings and confirm that data roaming is toggled off for that line. On iPhone, this is under Settings > Mobile Data > [Your Home Line] > Data Roaming. The Truely line's data roaming setting doesn't need to be changed — Truely's plan is designed for international use and the plan terms cover roaming behavior on partner networks.
When the Setup Takes Longer Than Two Minutes
The two-minute claim is accurate for the majority of devices and setups. A few scenarios extend this timeline:
Device carrier lock: Some devices purchased directly from a carrier (not unlocked) restrict eSIM addition to profiles from that carrier. This is increasingly uncommon — most carriers have removed these restrictions — but if your device was purchased on contract from a carrier that still enforces this policy, you'll need to request an unlock before adding a Truely eSIM. Carrier unlock requests typically process in 24–48 hours.
iOS update required: Occasionally, an iOS update introduces changes to how eSIM profiles are provisioned, and a pending update must be installed before a new eSIM profile will install correctly. If your iPhone hasn't been updated recently and the QR scan completes but the profile installation fails, check for a pending iOS update first.
Corporate MDM restrictions: Devices managed through enterprise MDM (Mobile Device Management) systems may have eSIM installation blocked by corporate policy. If you're traveling with a company-issued iPhone, confirm with your IT department that eSIM installation is permitted before departure.